
A dresser is an essential piece of furniture for most people’s bedrooms, except for those with ample closet space or preferring a modest lifestyle with few clothes.
Dressers are versatile furniture you can place in various rooms of your home. They can serve as a TV stand in your living room or as a home coffee station in your kitchen or dining room.
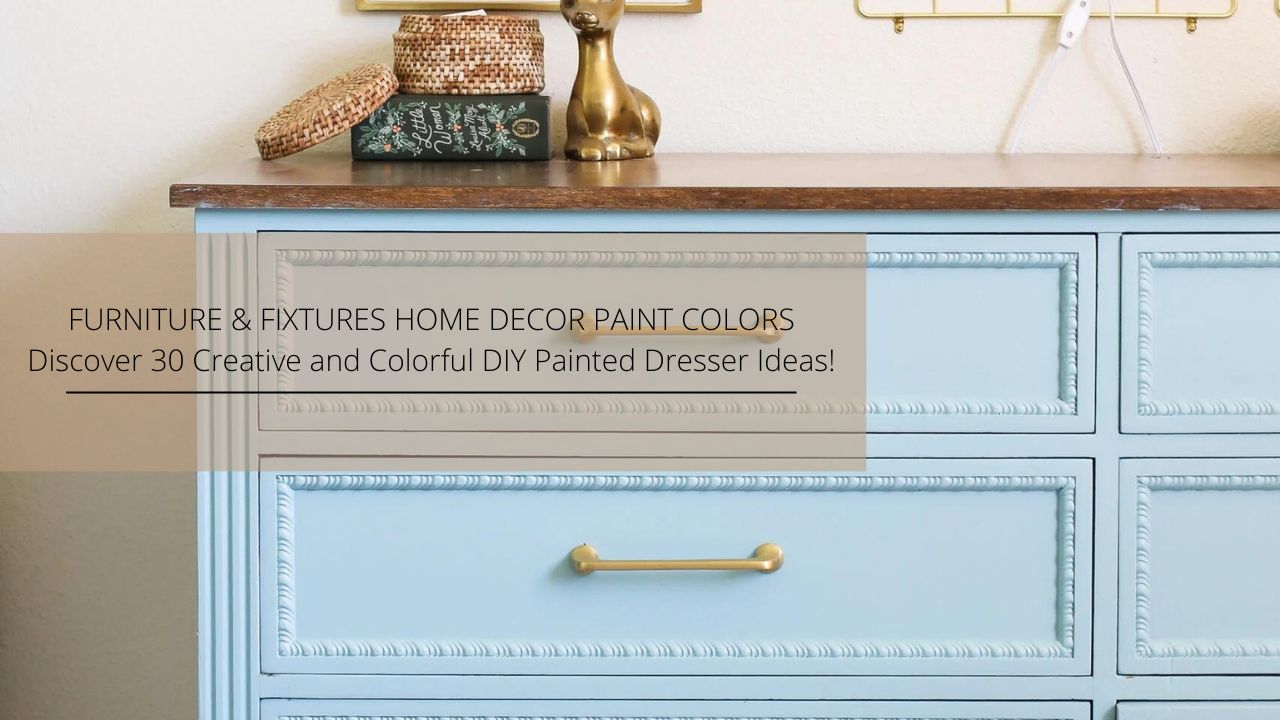
Moreover, parents can also use dressers to store all the tiny clothes of younger babies in their rooms. Although painting a dresser might seem like a simple do-it-yourself project, deciding on a paint color and pre-painting stages need attention. We have compiled a list of some excellent DIY dresser paint ideas for your help.
The Basics of DIY Painting
Do-it-yourself is the best approach to transforming the look of an old dresser into a whole new one without investing a lot of money, effort, or specialized skills to paint it. You can experiment with multiple dresser paint ideas if you know the correct pre and post-painting rules,
Preparation
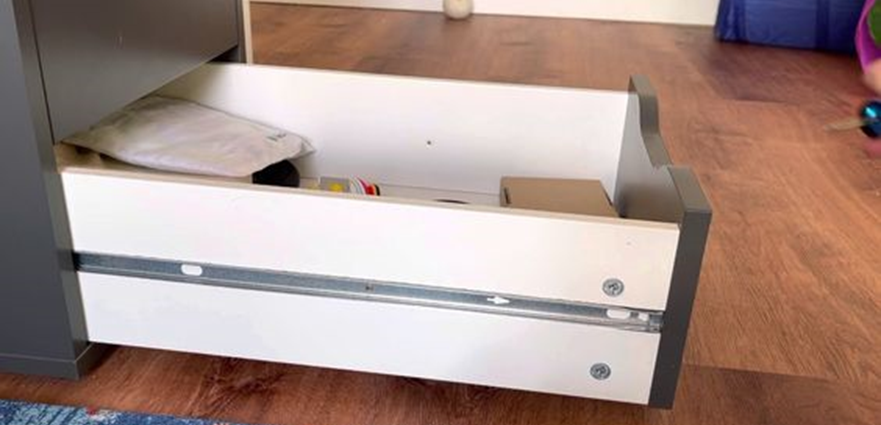
- Before removing the drawer knobs with a screwdriver, unload every drawer.
- Use a magic marker or painter’s tape to label the back of hinges and knobs with the door or drawer they belong to.
Sanding and Priming
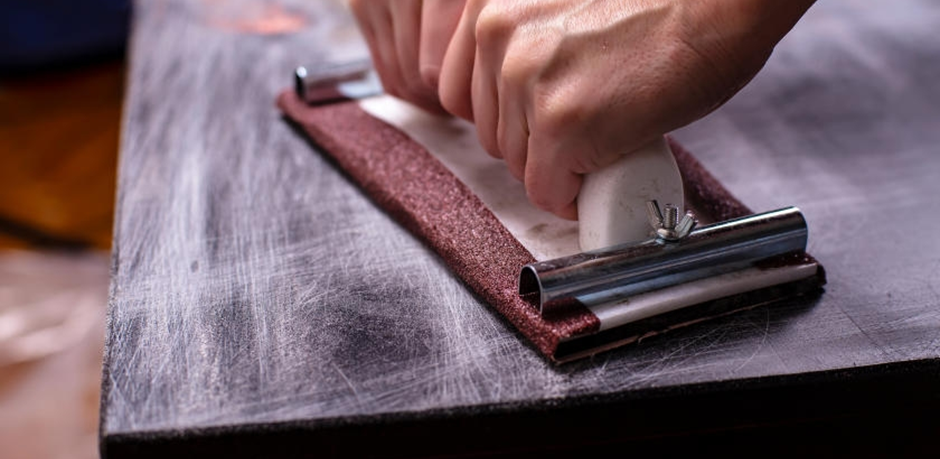
- Thorough sanding is essential for a smooth surface.
- Use painter’s tape to mask off any parts you will not paint.
- Brush the primer in two thin coats.
- Before painting, ensure the outer layer is dry.
Painting
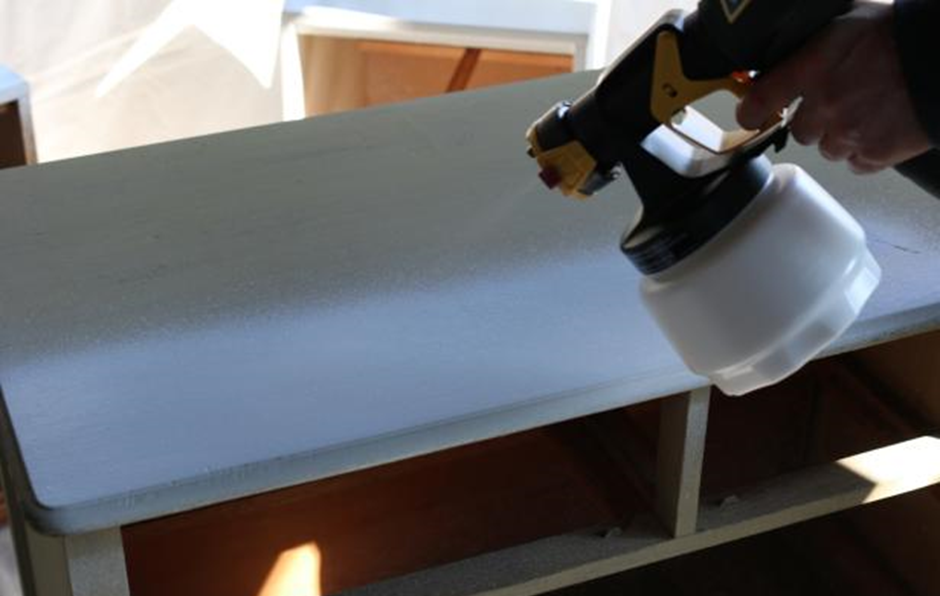
- Arrange the drawers on the groundsheet with their back sides facing outward.
- Use a roller to paint the level areas and a curved brush to remove any paint drips.
- Apply an extra fine coat using a delicate cloth.
- Wax buffing can improve gloss and color brightness.
Easy-To-Follow Dresser Paint Ideas
You can transform your old dresser into a stunning furniture piece and the centerpiece of any room. Follow the routine procedure of coloring, sanding, and gloss waxing before painting. Scroll down to explore fascinating dresser paint ideas.
1. DIY Classic Dresser
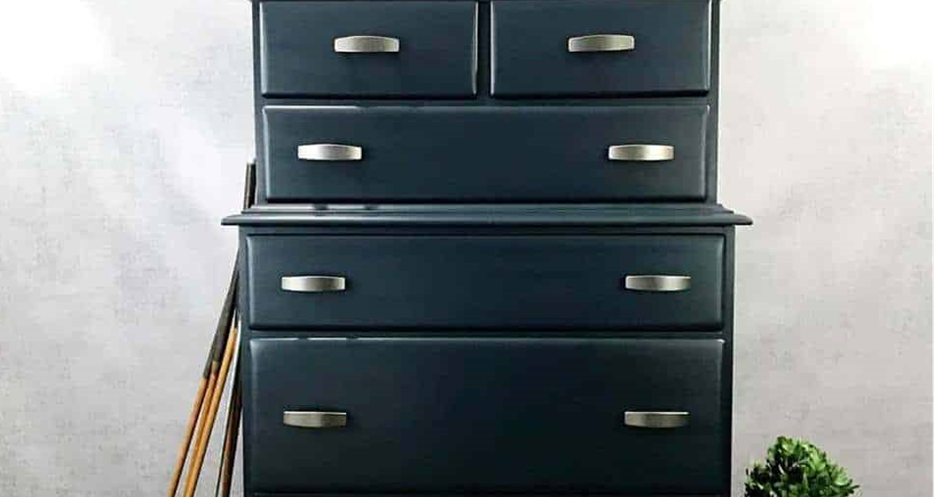
A vintage dresser becomes the focal point in your bedroom due to its appearance. It doesn’t require additional décor and displays an elegant look itself. Follow the pre-painting rituals, and then paint the drawers with a vibrant color of your choice.
To complement the dresser with an antique appearance, use sandpaper to transform the edges and corners with a withered look. Protect your freshly painted dresser from dings and stains, and apply an additional coat of paint for extra protection.
2. DIY Entranceway Dresser
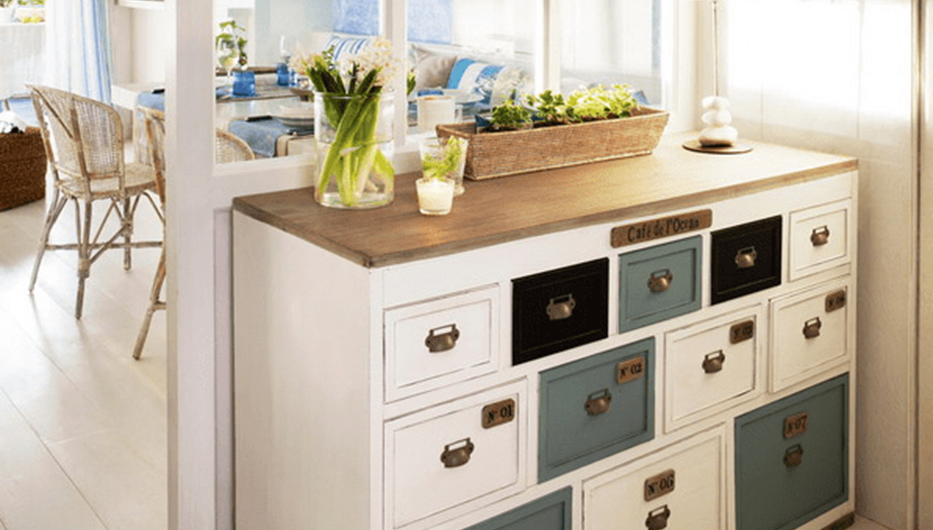
Dressers have several uses, and you can find many different models with multiple drawers of varied forms and dimensions.
Innovatively upcycle the entranceway old dresser. As you see in the image, the dresser has numerous drawers painted in two alternate colors.
Decorate the dresser top with some lovely foliage and colorful flowers. Keep them in a glass vase or wooden plant holder to create a stunning setup.
3. DIY Fancy Dresser
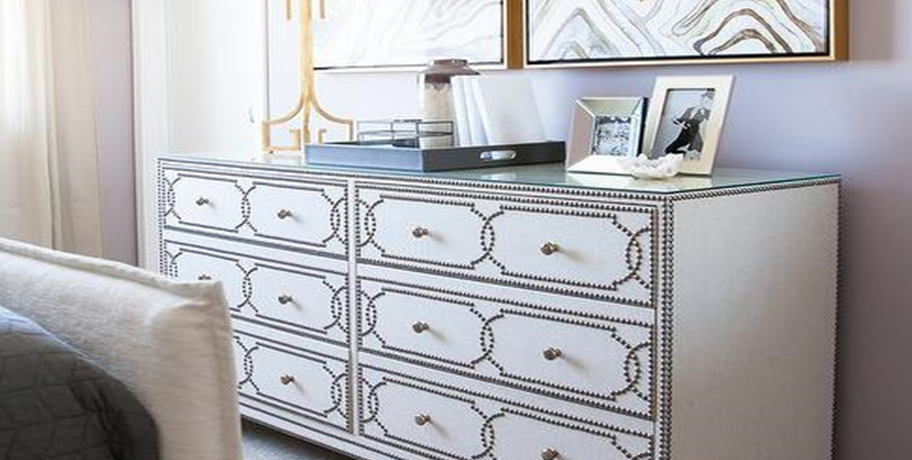
Fancy nail head trim readily adds style to a plain dresser. You can make creative designs from the nails used to attach fabric or furniture.
Numerous styles of decorative nails, including dome-shaped, square, button, and even crystal-encrusted, are available in several sizes, hues, colors, and shapes. The dresser in this image appears fabulous.
The owner has painted it in a neutral color and created a lovely geometric pattern. The decorative accents, like abstract artwork on the wall and a fancy lamp on the dresser top with the rose-gold plated photo frames, need mention.
4. DIY Composite-Style Dresser
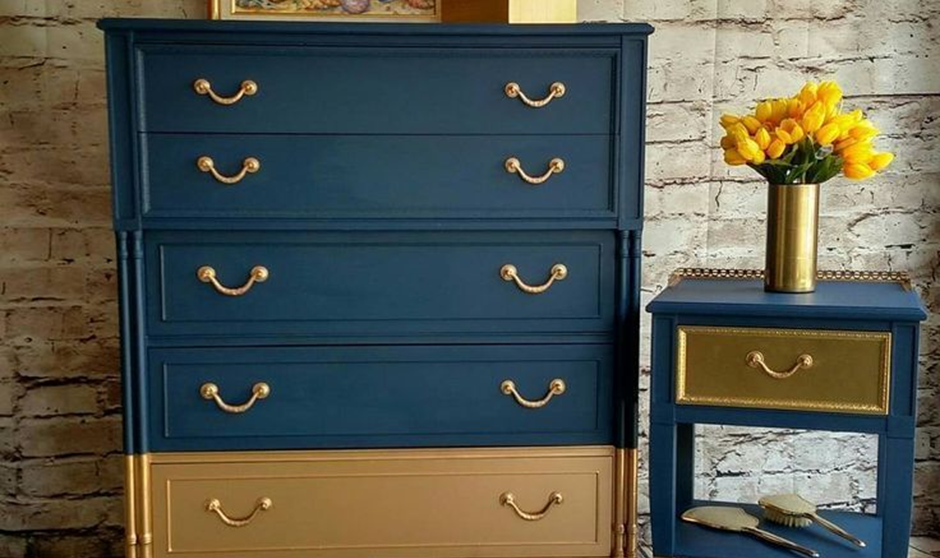
Incorporate various materials or coatings on the body and the drawers to give your dresser a unique approach. For instance, color the drawers and the dresser in two different shades.
Make the dresser’s framework look glossy, paint the drawers matte or do it otherwise. You may apply metallic paint on the dresser’s gadgets. Coat the structure and drawers with a non-metallic finish.
Tip: Put on metallic shades in a single direction. Streaks will appear when you paint in a forward and backward motion.
5. DIY Industrial-Styled Dresser
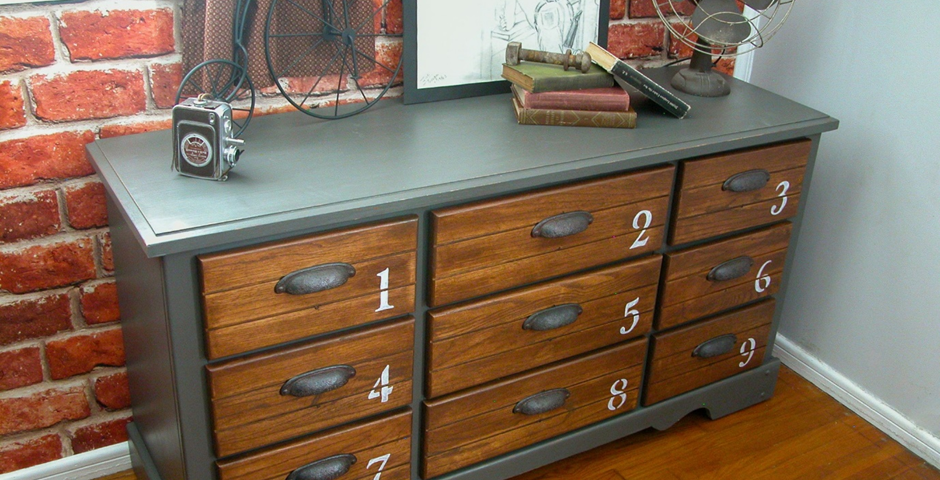
To create an industrial look, use reclaimed wood and metal handles. Apply chippy paint. The chippy painting method gives your old wooden dresser a worn-out or old-fashioned look.
It entails applying coatings in layers so that the top ones seem to have peeled off over the years, exposing varnish or wood underneath.
There are many techniques for getting the chippy paint appearance, such as using furniture paint or milk paint as a repelling agent. Vaseline can create a unique texture, too.
Swap the drawer grasps with large, sturdy handles to add more texture, and cover the fronts of the drawers with lathe cuttings to give them a planked appearance.
6. DIY from Dresser to Office Desk
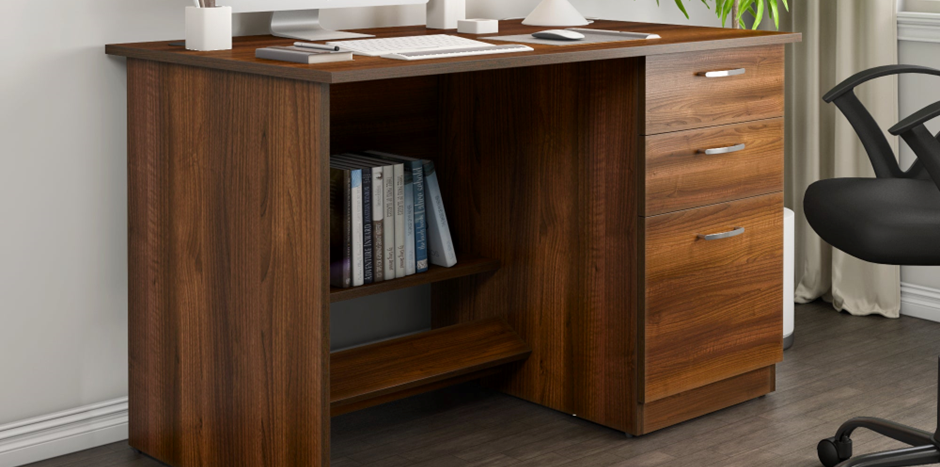
You can makeover your outdated triple dresser without hassle after this DIY idea. This image is inspiring. Cut out two left rows of drawers and their framing to build the kneehole desk.
You can use a saber saw for it. Moreover, you can add racks for your stuff or may use them as a footrest. Apply rich-hued brown paint for the dresser, new drawer handles, and a new desktop with the same finish.
The goal of the chippy paint technique is to mimic the natural wear and tear of a painted piece of furniture abandoned and exposed to natural elements.
7. DIY dresser with Rope Grips
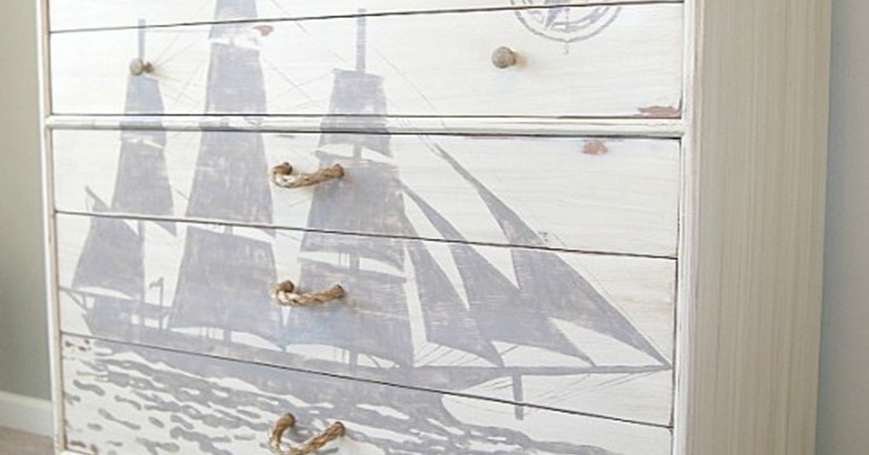
Upgrade the look of your dresser with this intriguing idea. Start by thoroughly cleaning and painting the drawer and its components. Select sturdy, thick rope for grips.
Use a drilling machine to drill about a quarter of the way through the drawer, starting on the inside. Afterward, proceed with your drill to the drawer’s exterior and drill entirely.
Utilize clamp connectors since they are ideal for securing the rope to the drawer. Slide it along the clamp connector, then tighten it with a screw to secure the rope grips.
8. DIY Dresser with Fabric Inlays
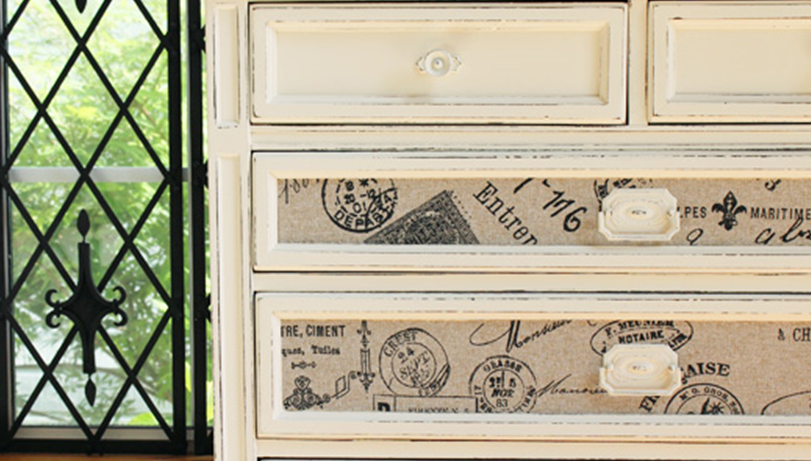
You can select an off-white shade for painting. Next, sand the edges, and apply coats of clear wax on the furniture piece. Even you can spray-paint the faded hardware to give them a new look.
Buy fabric of neutral shade with stain-resistant capacity. Use fabric cutter tools to measure and cut it to the drawers’ panel size. Brush the drawer font with water-based glue to stick the fabric pieces. If you find it messy, take it down and re-adjust it for a perfect look.
9. DIY Dresser with Metallic Grips
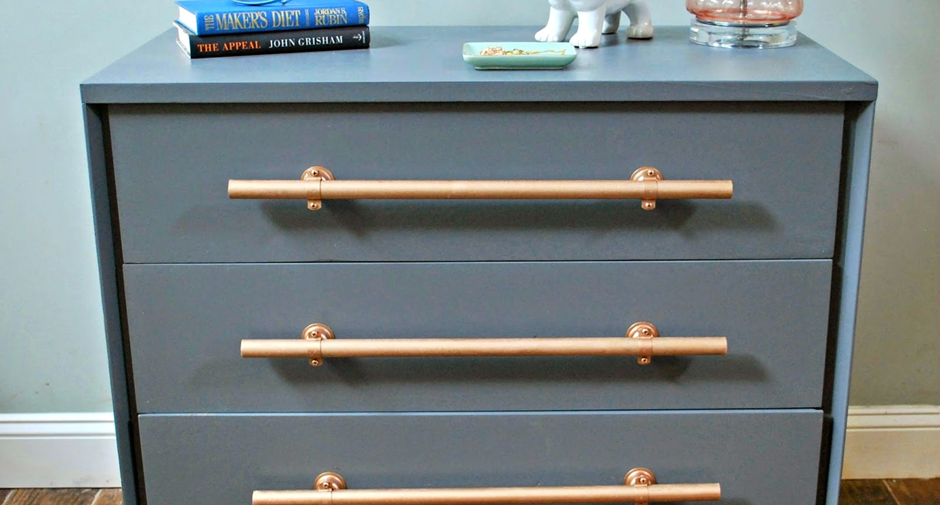
Are you ready to create bright and attractive grips to change your dresser style? For this project, you need copper pipes and paint of your choice.
Cut the copper pipes with a pipe cutter into equal sizes depending on how many grips you need for your dresser drawers. You need curved-shaped hangers to secure the metal pipes in place and keep it away from the drawer surface.
Use bolts with flat heads to limit the space next to them.
Tip: Smudged fingerprints can quickly taint copper pipes. Clear spray paint sprinkled over the copper grip will shield it from oxidation and smudges.
10. DIY Industrial Dresser
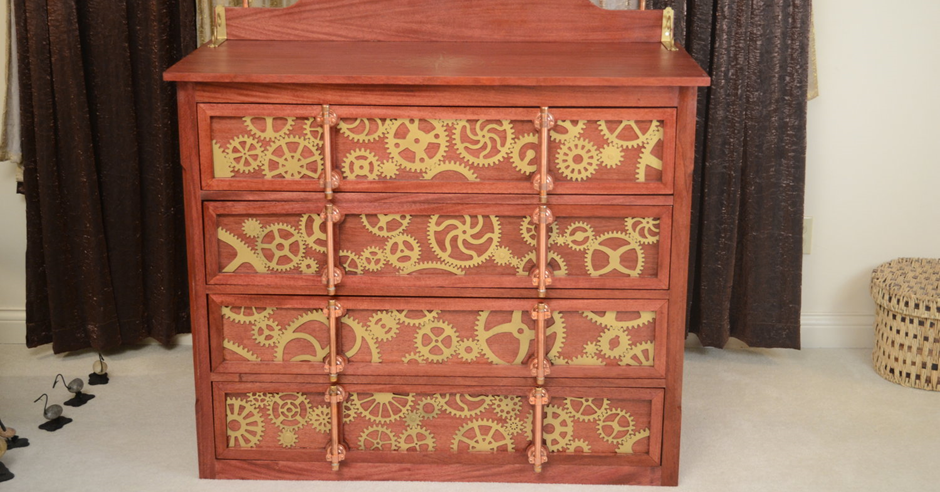
If you have an old-fashioned mahogany dresser, you may change its look with industrial-era symbols. It will look like high-grade furniture and enhance the aesthetic of your bedroom. Your kids like this steampunk-styled dresser, too.
Look at this image for your inspiration. The heavy mahogany drawers with vertically positioned grips appear distinct. Stain your dresser with russet color.
The most eye-catching element of the piece is the CNC-cut gears on the dresser front. They are entirely different from one another in shape and size. Use wood glue to fix them on the drawers. Apply clear wax on the gears for a finishing touch.
11. DIY French-Styled Dresser
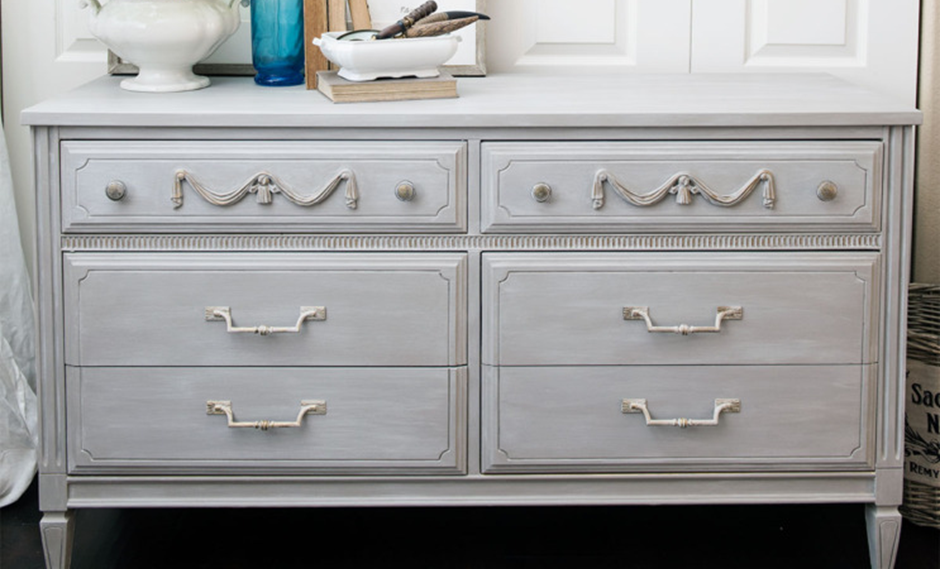
Do you like to restore your dresser to a French makeover? You may prime the chest, considering its coloring condition. Use an adhesion primer to make your paint stick.
Select the taupe shade, deep grey with a brown hue, to get this color effect.
Blend the shades of grey and white fifty-fifty. Mix your paint in a plastic container. Thin the mixture with water until it shows watery consistency. Apply a layer of clear wax using a firm brush. Apply the paint mixture on the wet wax layer.
Remove the paint mixture with a dry, clean rag. Finally, apply a little metallic finish and allow the piece to dry.
Tip: Take away the drawers from the cabinet if the dresser has a vertical separator in the middle to facilitate painting less strenuous. Paint the drawers diagonally and the other area vertically.
12. DIY Dresser from File Cabinet
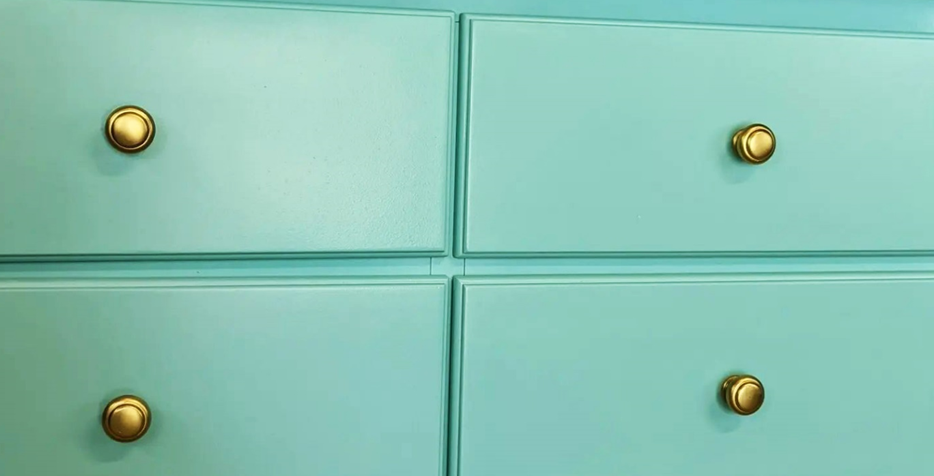
This DIY paint idea shows you how to transform an old MDF file cabinet into a stylish dresser. You need water-based, versatile chalk paint for the makeover. There is no need to sand laminated MDF furniture or prepare it any other way before painting except by cleaning it. Apply a natural-bristled paintbrush for a uniform finish.
First, thoroughly clean the filing cabinet of all dust and grease. Next, apply chalk-white paint to the filing closet using even strokes. Before adding a second coat, give it an hour to dry. Apply some clear wax finish to the piece after the paint has dried.
Buff the surface with a dry cloth until the finish looks nice and even. Whirl it around the piece surface to achieve this. Mark the drawer spots for attaching brass hardware.
Create tiny pilot slots slightly smaller than the supplied screws using a drill. Place brackets and grips on the drawer surfaces, align them with the initial holes, and drill screws into place.
13. DIY Mint Dresser
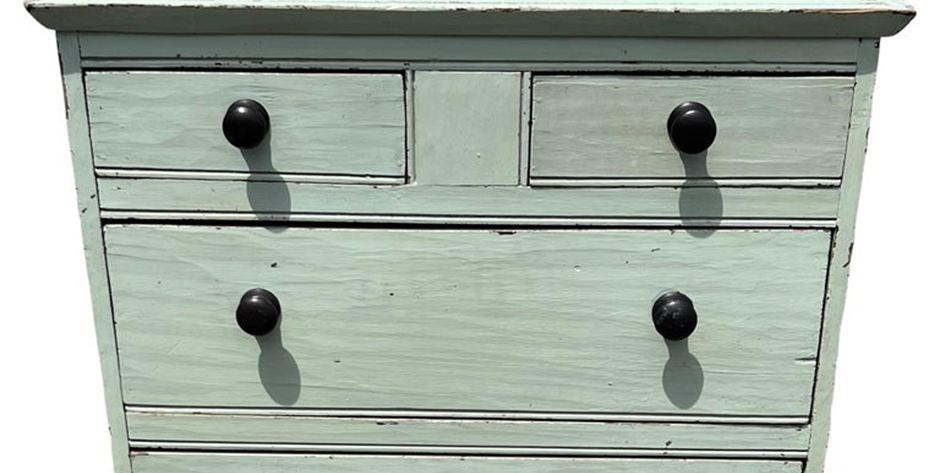
Change the appearance of a conventional organic wooden dresser to a pale green piece. Apply a base coat of oyster-white paint in the beginning.
Oyster White has an earthy green undertone with a warm off-white color. Next, apply a shade of subtle green. After the second coating of green paint, use a wet cloth to repel some paint and expose the oyster white base coating.
Continue the process, and in the end, you will get a combination hue of both colors. A combination of bold metal knobs can accentuate the mint dresser features.
14. DIY Barn Door Dresser
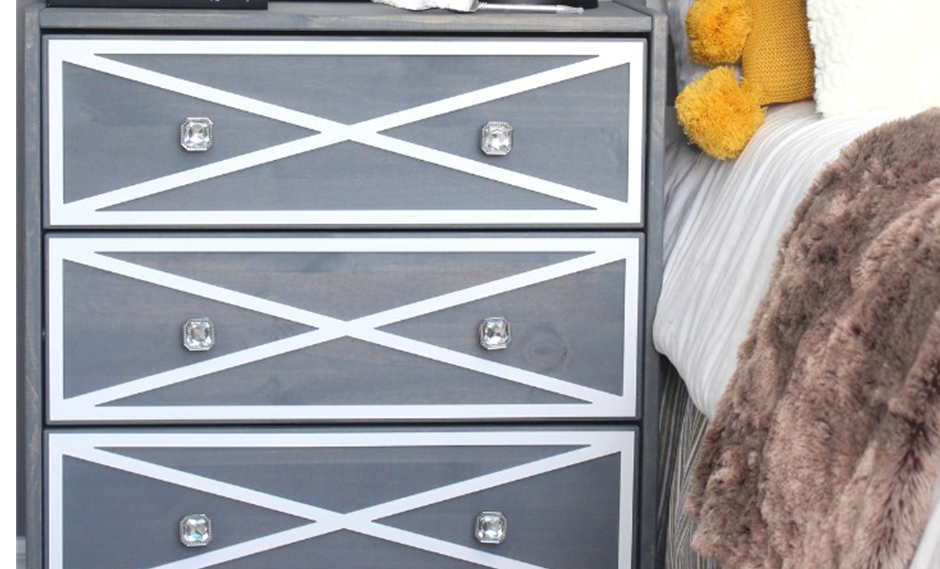
If you have a plain-looking neutral-hued wooden dresser, follow this dresser paint idea to create a designer piece.
You need two paint colors, one dark and another white in hue, to create a lovely piece. You need thin wooden panels for decorative trims.
After the initial preparation, paint your drawers with a dark color and panels with white. Give time to dry up the paint. Now apply glue to the back side of the overlay panels and stick to the drawer front.
15. DIY Dressers with Artwork
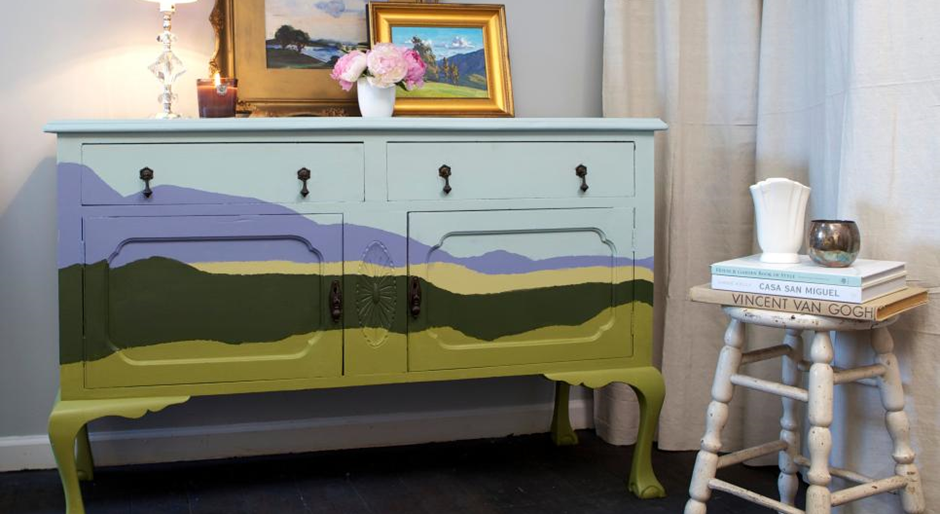
The design in the image is super easy to follow. Pick up a design image that you can utilize as a master element for the layout.
Take a printout of the design and trace the graphic onto your dresser using freezer paper. You can pick up paint colors considering the base color of the dresser. The top colors need to be distinct from one another.
After removing the freezer paper, give it a couple of coats with a foam brush to offer a distinctive appearance. Use the rub and buff method to drawer pulls for an instant facelift, and then use a paper towel to rub the extra wax off.
16. DIY Guestroom Dresser
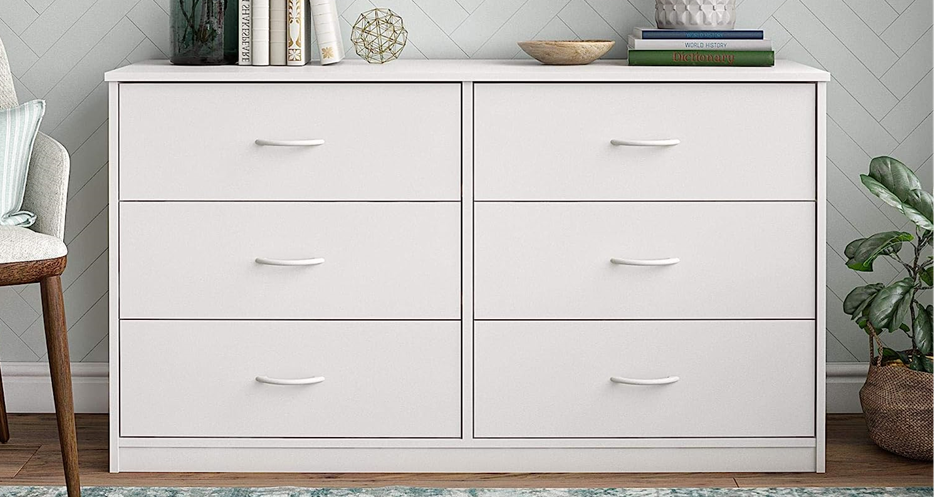
Do you like turning old things into something attractive and worthwhile? Follow this Paint your old dresser in grey color.
The color grey on your dresser is always a good choice. Consider adding chic and elegant knobs to make it even more lovely. Display the remodeled dresser in your guest room for the comfort of your guests.
Decorate the chest top with a glass plant holder and a delicate white lamp. Paint the back wall in a neutral color. It is an excellent way to create a cohesive layout.
17. DIY black-Painted Dresser
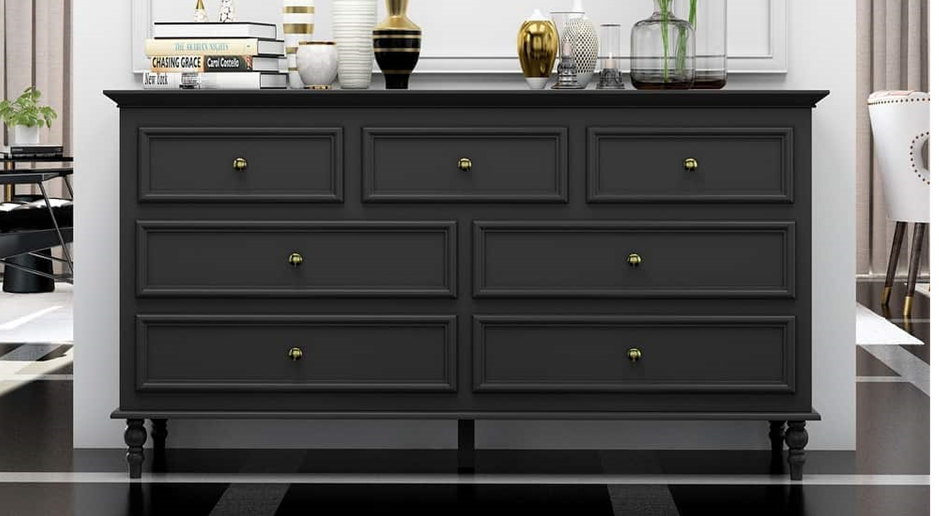
Black is an amazing color. You can choose to repaint some worn-out cabinets or dressers in the shed. However, black can be difficult to work with, so proceed with the painting work slowly. It is crucial to be aware that you paint all sections of the dresser accurately.
Experts advise designers to use a quality brush to add multiple thin coats of paint with all care and not to overlook any areas or leave any marks.
18. DIY stripe-Painted Dresser
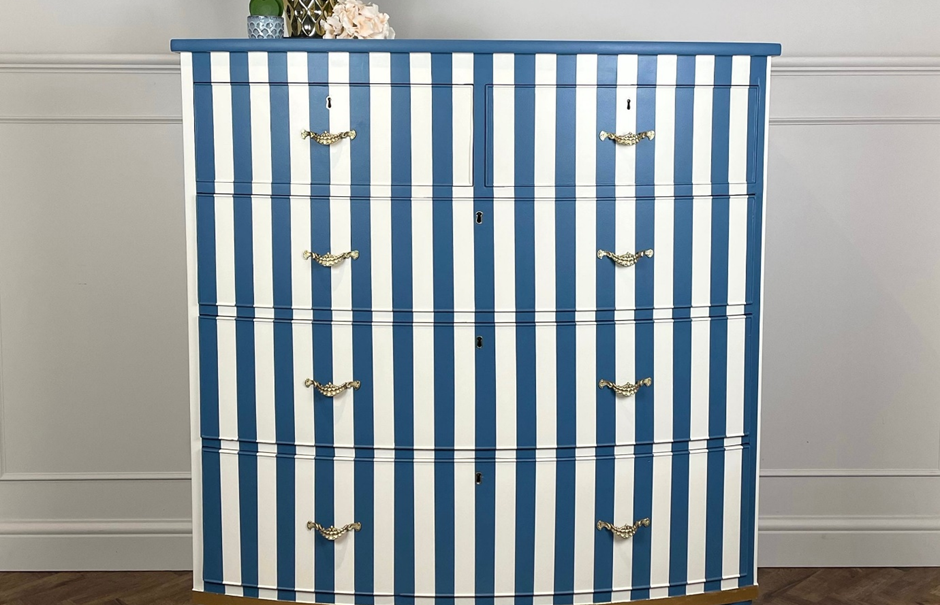
Painting stripes on furniture is a great way to give your dresser a unique and fun touch. You can use two colors, as you see in this dresser, or add more complexity using a paintbrush to add innovative patterns and accents.
You can design stripes on both new and old pieces. It is the best thing about stripe painting. Apply the first coat to the dresser, in this instance, white. For even treatment, you may apply two to three coats. For texture, do light sand if needed.
Next, use painter’s tape to glue the stripes to the drawers. When making a stripe, try to place the drawer’s grip holes in the center of it. Use greyish-blue paint to cover up the unpainted areas on the drawers.
Never apply excessive paint as it may sip beneath the tape or make it more difficult to peel off later.
19. DIY Black-Gold Painted Dresser
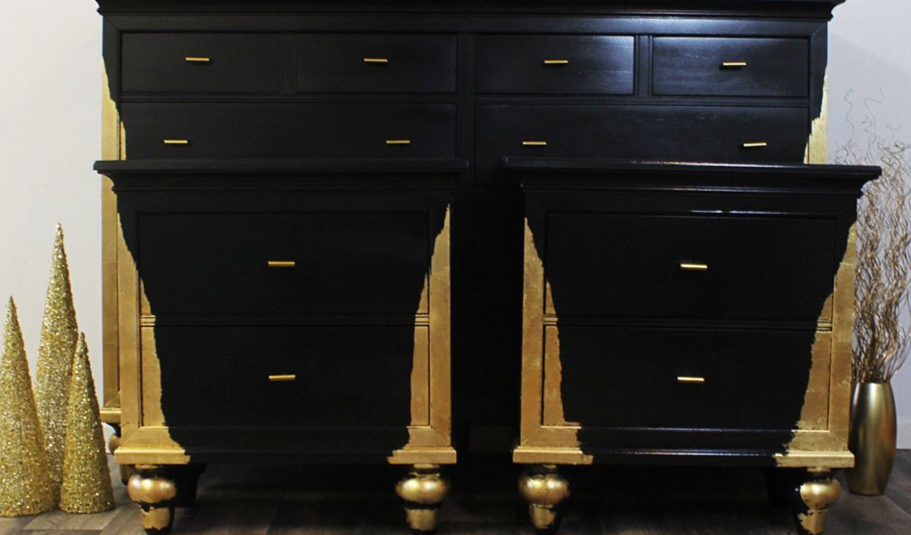
If you want to give an antique or vintage dresser a new look, choose to paint the dresser with gold and add black paint. The combination of gold and black will give your dresser an elegant and sophisticated look.
Use a good-quality synthetic brush or foam paint roller for a bubble-free smooth texture for your dresser. Apply the paint with long brushstrokes. Allow it to dry thoroughly before adding another coat.
The top coat is not necessary for fusion mineral paint. However, if you anticipate heavy use, you may cover your dresser with a water-based or polyurethane coating. Finally, install drawer grips or pull of your choice.
20. DIY Blue-White Painted Dresser
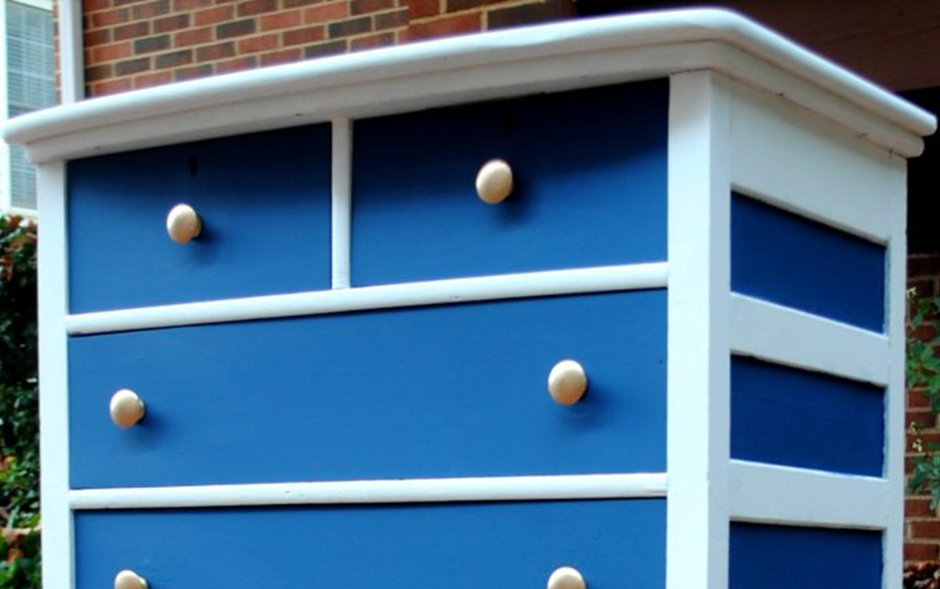
This DIY dresser paint idea is an excellent way to rejuvenate a distressed dresser quickly. Choose a classic shade with dazzling knobs to change the dresser’s withered appearance. Apply chalk paint to avoid sanding and priming.
In this image, the combination of deep blue and pure white in the dresser is stupendous. Apply three coats of white and blue to exhibit a comprehensive look.
Next, wax it carefully and spray-paint the dresser’s knobs gold to let them stand out.
21. Gray-White Painted Dresser
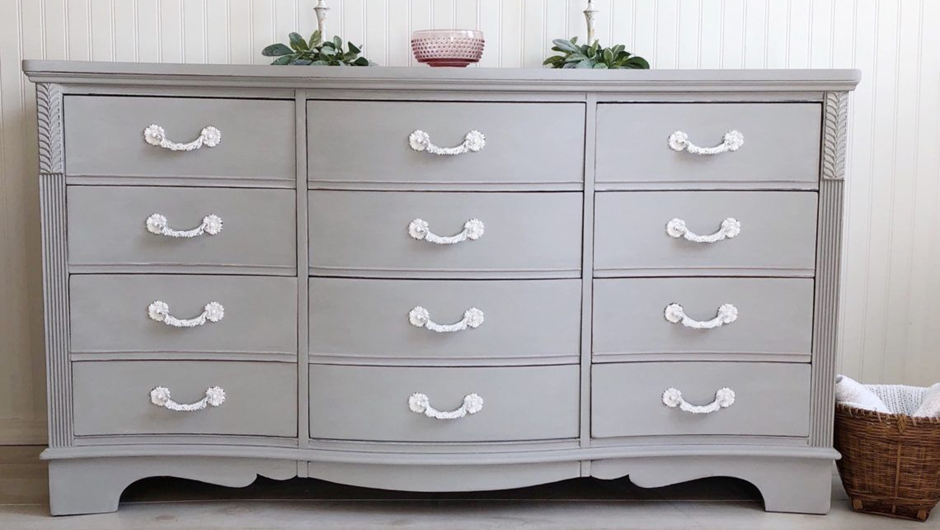
In the above example, the designer applied a white base coat before a second cover of grey on top. The juxtaposition of subtle and dark hues creates a distinctive color combination that works well together.
To create this effect, begin with a base coat in your preferred shade of white, and then add the final coat in your chosen shade of grey.
Spray paint the drawer pulls with silver metallic color to add brightness to the piece.
Tip: Select the chalk paint color for your convenience.
22. DIY Ombre-Painted Dresser
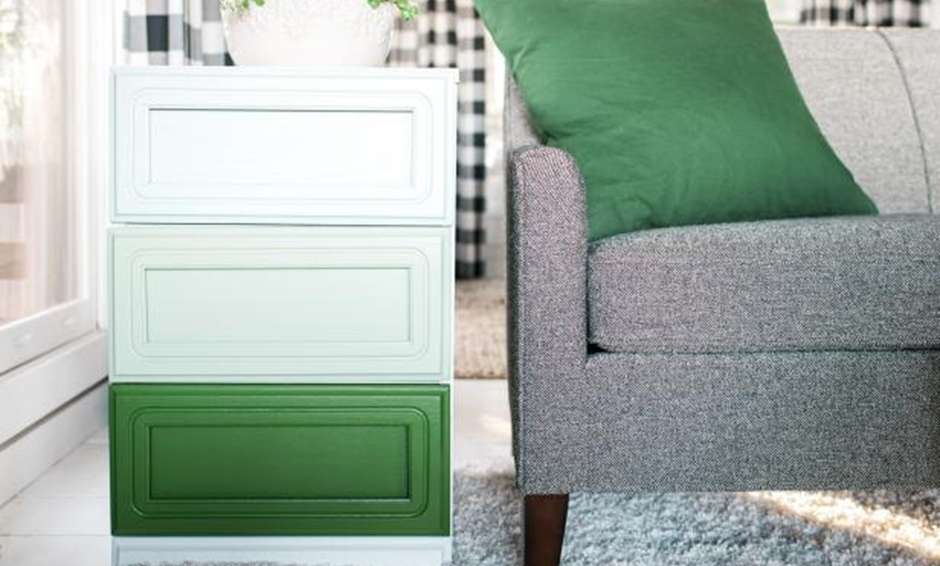
If you enjoy adding unique elements to your furniture, consider using the ombre effect design. This method creates a gradient of various tones of the same color on a surface.
You require typical paint items like primer and a paintbrush. You need white paint as the base color, another color of your choice. After removing the dresser hardware, detach the drawers and sand them nicely. Apply a coat of primer for the finish.
The most vital aspect of ombre painting- the color shades are precisely correct- is to produce the desired gradient. Fill several plastic cups with the color of your choice, and then combine just the right amount of white paint to give each one a distinctive tint.
As you work your way up the dresser, apply the darkest shade of color to the lowest portion of the piece. According to their position in the furniture, paint the drawers in various tones, carefully blending the new coat with the previous. It is especially crucial for the dresser’s sides because they have an observable ombre art effect.
The last step of the renovation is to reconnect any hardware or other components that you initially took off the dresser after the paint dries.
23. DIY Ombre Scallop-Patterned Dresser
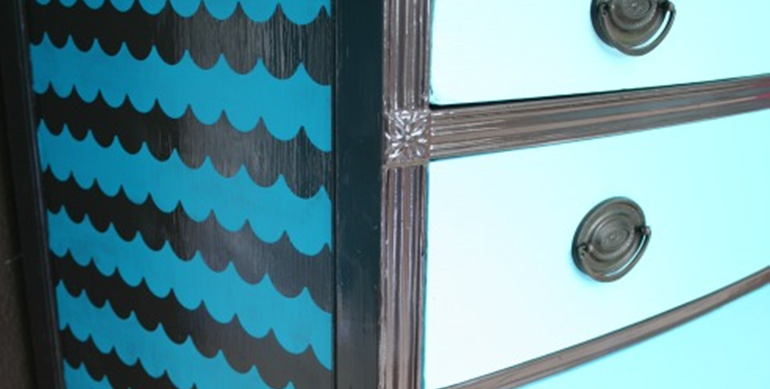
As you are familiar with ombre painting, you may love to explore more ombre painting design ideas for your old but sturdy dresser.
After completing the pre-painting cleaning procedure of your dresser, arrange the necessary items, including the paint of your choice.
You require masking tape for this project to make patterns on the dresser sides. The way you arrange them can create many different styles. In the image, the painter has made a scallop pattern on the side of the dresser while keeping the front part with a simple ombre effect.
24. DIY Dresser with Bone Inlay Design
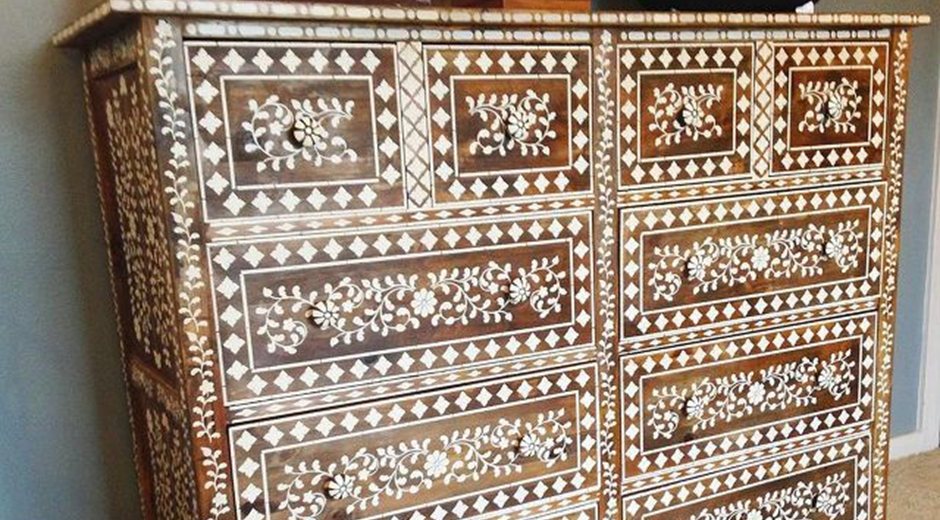
This DIY act will have a metamorphic impact on your dresser. For this fun project, you require painting tape, a paint roller, a paint tray, and a bone inlay stencil design of your choice with greyish-white paint.
Choose a dark chalk paint color to paint the dresser’s base. Start stenciling after one day. Set up the stencil on the drawer surface and apply painting tape to the first stencil you created.
Employ a craft roller to apply paint. Stenciled paint needs plenty of time to dry, so the stenciled portion of one sequence won’t smudge the color from another.
Continue the procedure to get the desired design and pattern, and let it dry overnight. Your dresser is ready with a new look. You can choose grips that complement your dresser’s makeover.
25. DIY Rustic-Styled Dresser
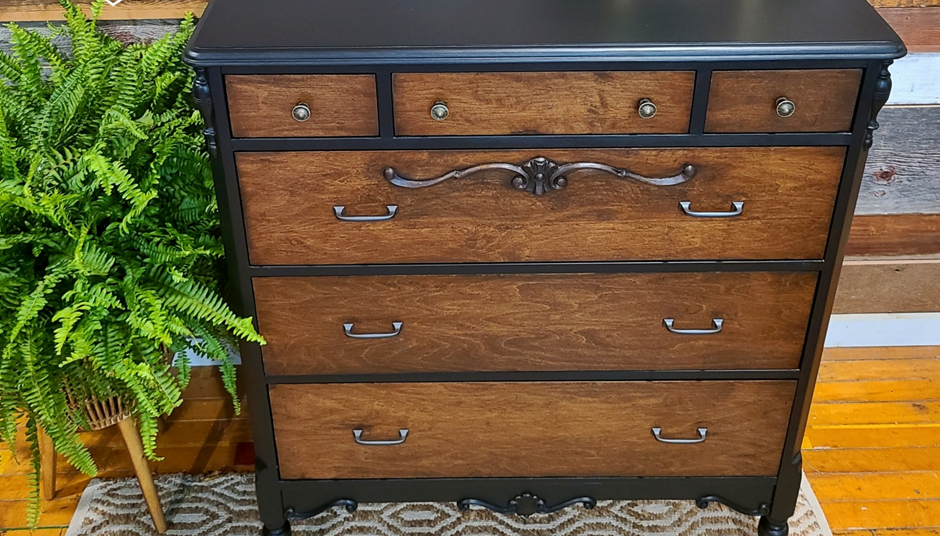
As You’ve got an aged dresser, your dresser needs a makeover, and you want a rustic but stylish look for it.
Remove the drawer grips, then apply a generous layer of paint stripper to the drawer surfaces. After letting it sit for almost half an hour, kick-off scraping until all paint colors come off. Stain the drawers for a dark chocolate-brown hue.
Use a paint sprayer to coat the dresser top and sides with a medium-dark shade of blue.
26. DIY Wash-Painted Dresser
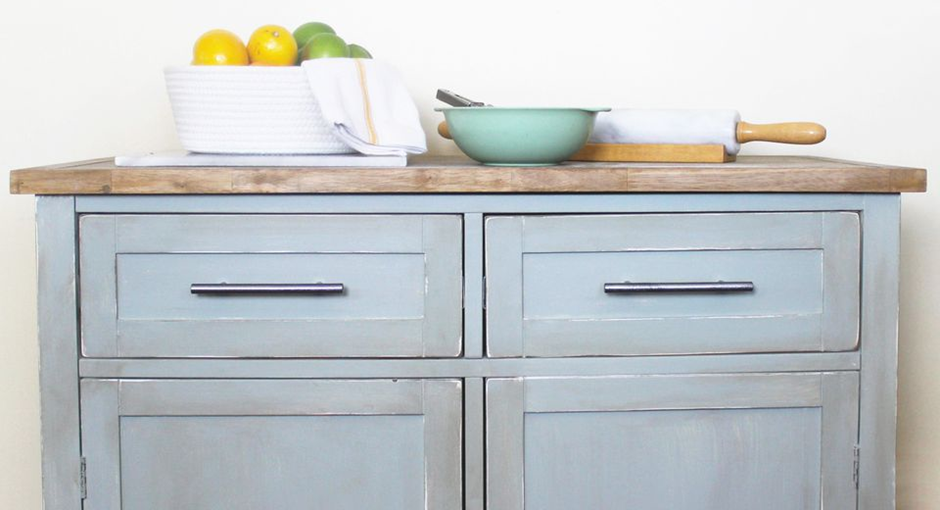
Transform your dresser with wash paint to give it a distinctive appearance. A wash offers a thin coating that reveals color underneath.
Start with a pre-preparation routine. Use water or a similar quantity of paint thinner to dilute the wash. Pick virtually any hue you like, but lighter is ideal since they effectively highlight the wood’s texture.
When the paint dries, sand the freshly painted color, especially at the edges presenting an organic look.
27. DIY Painted Dresser with Geometric Designs
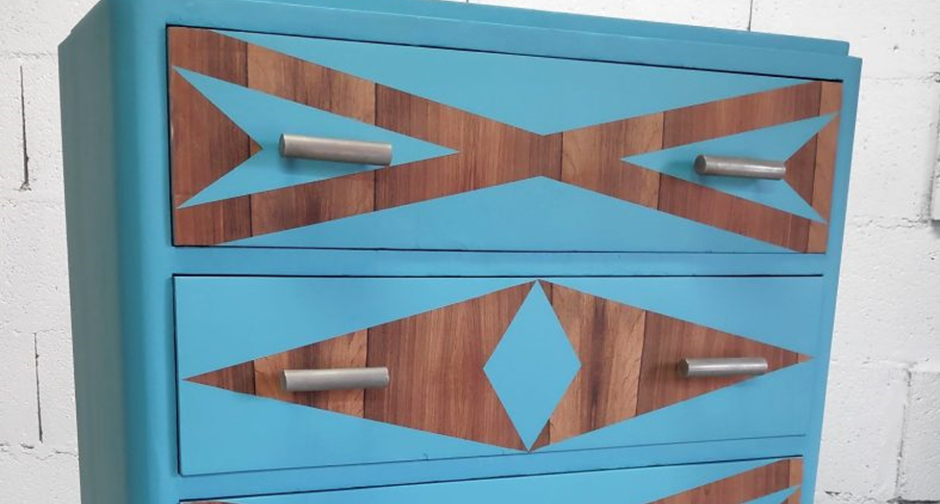
After cleaning and sanding, proceed towards designing geometric patterns and painting them.
Apply painter’s tape to the dresser front for rhombus and triangles of blue and unfinished wood. Apply two coats of blue paint with a brush and a craft paint roller to the dresser’s surface.
To finish it, coat it with a satin sheen topcoat. Drilling holes for draws is not necessary. Install the old knobs if they are still in good shape and complement the dresser’s new design.
28. DIY Stained White Dresser
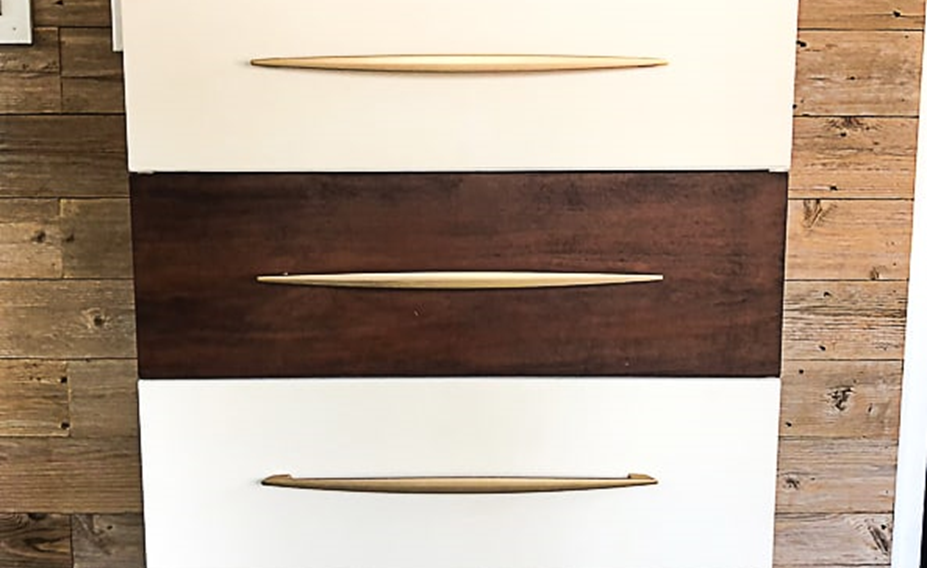
This project is one of the dresser paint ideas that can motivate anyone instantly. In this picture, the chest has four drawers. Three of them are painted white, and the second drawer front remains a stained look.
Sand your dresser neatly so it absorbs the dark walnut stain nicely. Before painting, apply a coat of primer for a better outcome. Use a paint sprayer to complete the task quickly.
Allow the paint to dry completely. Re-install the drawers and decorate them with metallic pulls.
29. DIY Painted Glossy Dresser
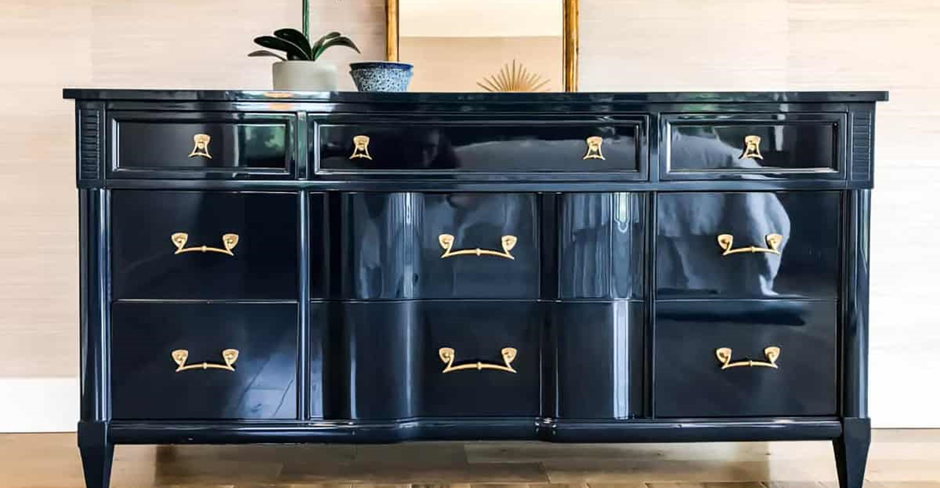
The navy blue brightens dressers of any shape, size, or age.
You can get this stunning finish for your drawer by spraying two coats of oil-based primer. Apply two coats of enamel paint and an absurd amount of sanding after each coat.
Always keep the surface of your sander completely flat. Avoid moving the sander up toward the edge. Check that your piece is dry after wet sanding for a shiny paint finish.
30. DIY Multihued Dresser
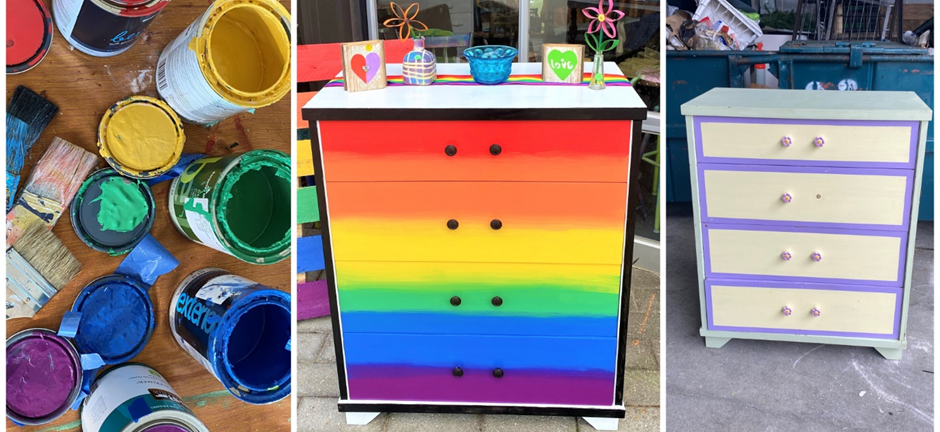
Transform your single-color painted old dresser into a rainbow-hued eye-catching piece.
Apply primer with a synthetic brush. After a couple of hours, apply oil-based enamel and allow it to dry.
First, add each section of the dresser together to form a rainbow design. Blend each acrylic color with white acrylic paint for a pastel hue. Arrange seven foam brushes and paper plates.
Next, paint the various taped-off sections with a distinct color in the color sequence of a rainbow. Paint the top part red and the last part violet.
Apply two coats of each color. Because acrylic paint dries quickly, allow about 30 minutes between coats. After the acrylic paint is dry, put on two layers of polyurethane to finish it.
Rub and buff the dresser draws to give them a new look.
Conclusion
We hope the DIY dresser paint ideas inspired you to give your old dresser a makeover. Once you’ve finished the transformation, you’ll be amazed at how much of a difference it makes!
Prepare your piece to absorb the new paint. Sanding and priming are the primary actions to give the furniture a new look. Not only will your dresser look brand new, but it will also last longer because you’re taking good care of it. Pick up an idea that suits your space and preference.
Please share your experiences in the comment box.